Setup your GasHawk
This section describes how you can setup your wallet to use GasHawk.
Quick Setup
Visit the Get Started page and connect your wallet.
Select your preferred chain from the list of networks shown and follow the instructions on your wallet to add GasHawk to your selected chain.

Once connected to GasHawk, you can proceed to the "Sign in with Wallet" by signing a message with your wallet in order to prove your control over it.

Manual Setup
To set up the GasHawk RPC manually, follow these steps depending on your wallet:
- Metamask (or similar)
- Rabby Wallet
| Chain Name | New RPC URL | Chain ID | Currency Symbol | Block Explorer URL (Optional) |
|---|---|---|---|---|
| Ethereum Mainnet | https://core.gashawk.io/rpc/1 | 1 | ETH | https://etherscan.io |
| Optimism | https://core.gashawk.io/rpc/10 | 10 | ETH | https://optimistic.etherscan.io |
| Base | https://core.gashawk.io/rpc/8453 | 8453 | ETH | https://basescan.org |
| Sepolia | https://core.gashawk.io/rpc/11155111 | 11155111 | SepETH | https://sepolia.etherscan.io |
For instance, to use GasHawk on Ethereum Mainnet, you'll use the settings below.
| Setting | Value |
|---|---|
| Network name (can be changed) | GasHawk Ethereum Mainnet |
| New RPC URL | https://core.gashawk.io/rpc/1 |
| Chain ID | 1 |
| Currency Symbol | ETH |
| Block Explorer URL (Optional) | https://etherscan.io |
Follow the steps below to update your wallet with the settings above.
Open the MetaMask browser extension.

Click on the three dots in the top right corner. From the menu that opens, click on
Settings.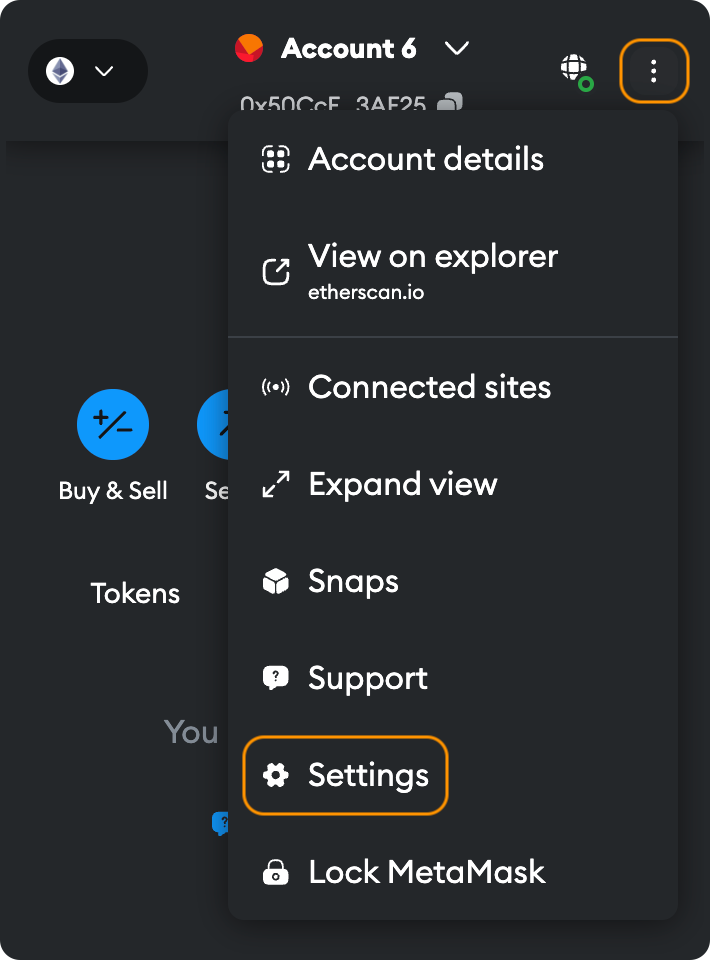
From the settings menu, go to
Security & Privacy.
Go to "Network provider" section. Click
Add Custom Network.
From the
Settingspage that opens, select "Ethereum Network" and click onEdit.
In the RPC section, select and click
Add RPC URL:
Now, enter the following information for Ethereum Mainnet in this case. Click
Add URL.Setting Value Network name (can be changed) GasHawk Ethereum Mainnet New RPC URL https://core.gashawk.io/rpc/1 Chain ID 1 Currency Symbol ETH Block Explorer URL (Optional) https://etherscan.io 
On next screen, click on
Save.
From the Setup page you should see a
Connected to GasHawkstatus in the top right corner.
Click on the Sign in with Wallet. You will be prompted to sign a message with your wallet in order to prove your control over it. Read more about why this is needed here.
In case you need further support, please reach out to us on Discord or X.
Open the Rabby wallet browser extension.

Click on
Moreat the bottom right.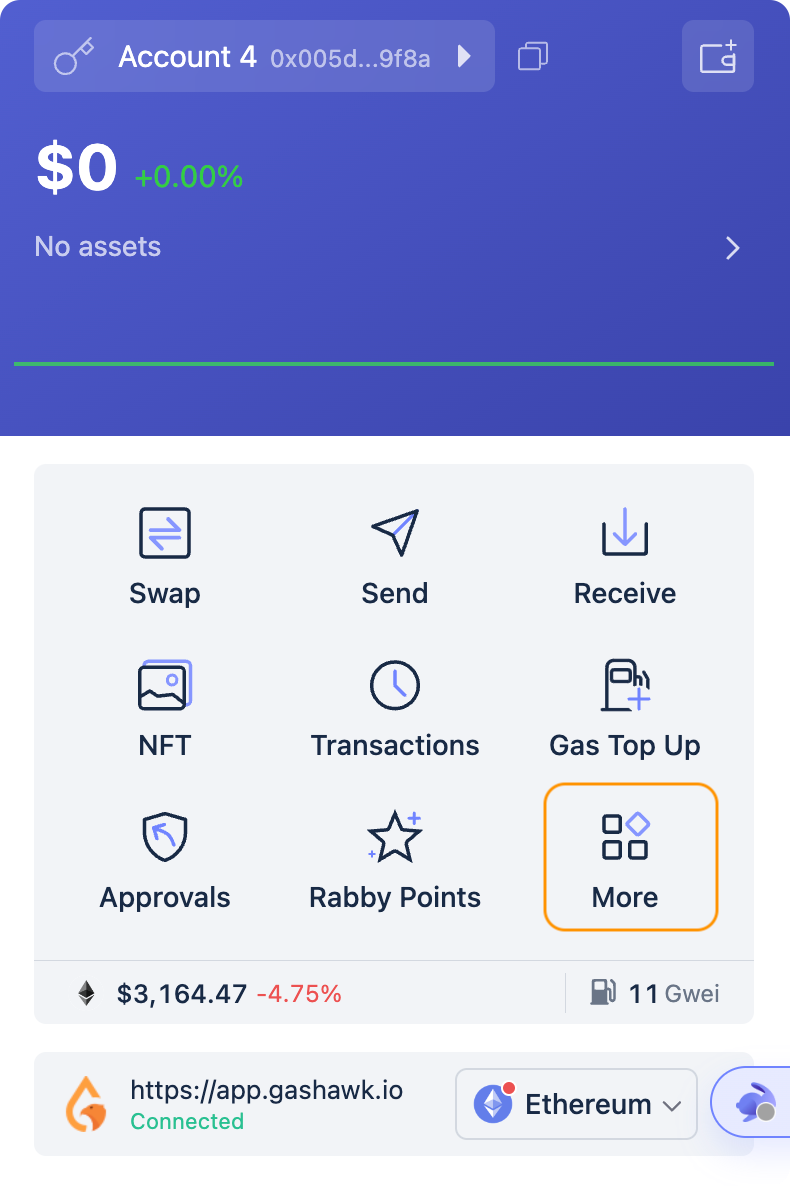
Select
Modify RPC URL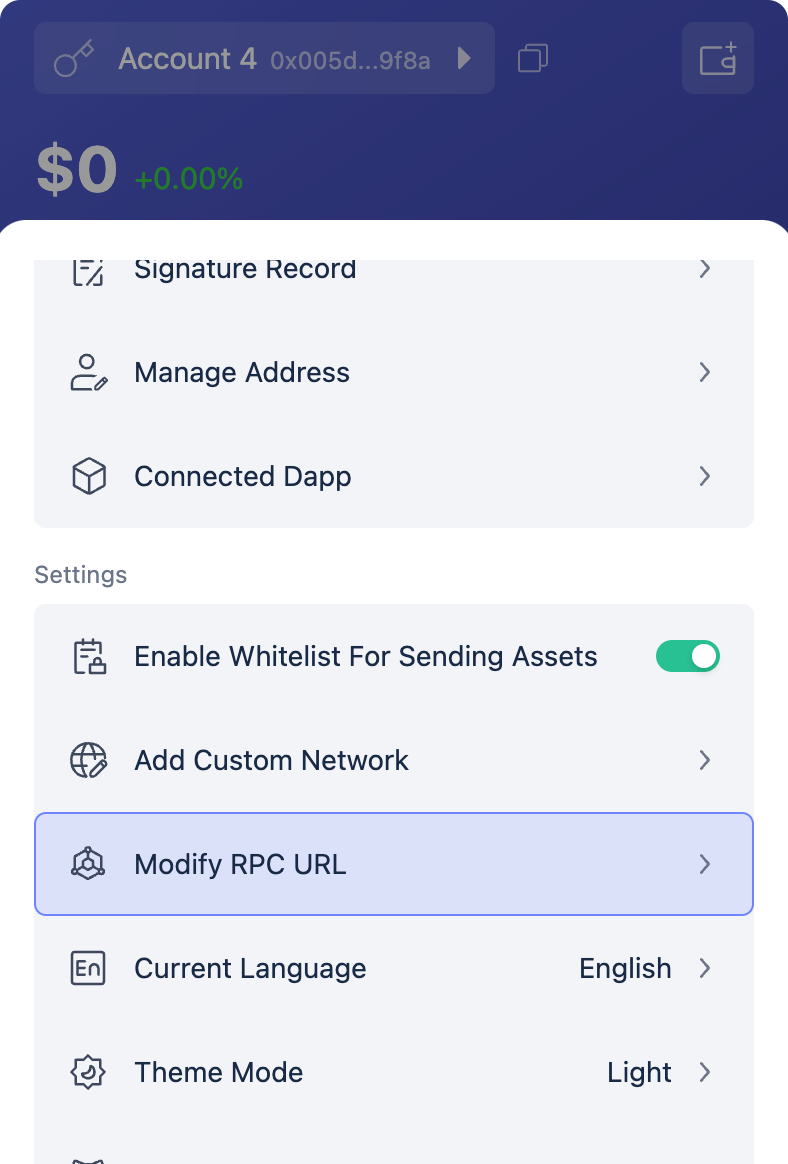
From the bottom of the Modify RPC URL page click on the
Modify RPC URLbutton.
Select one of the supported networks i.e.
Ethereum,Base,Sepolia, orOptimismfrom the list of networks. To use GasHawk on Ethereum, for example, selectEthereumfrom the list.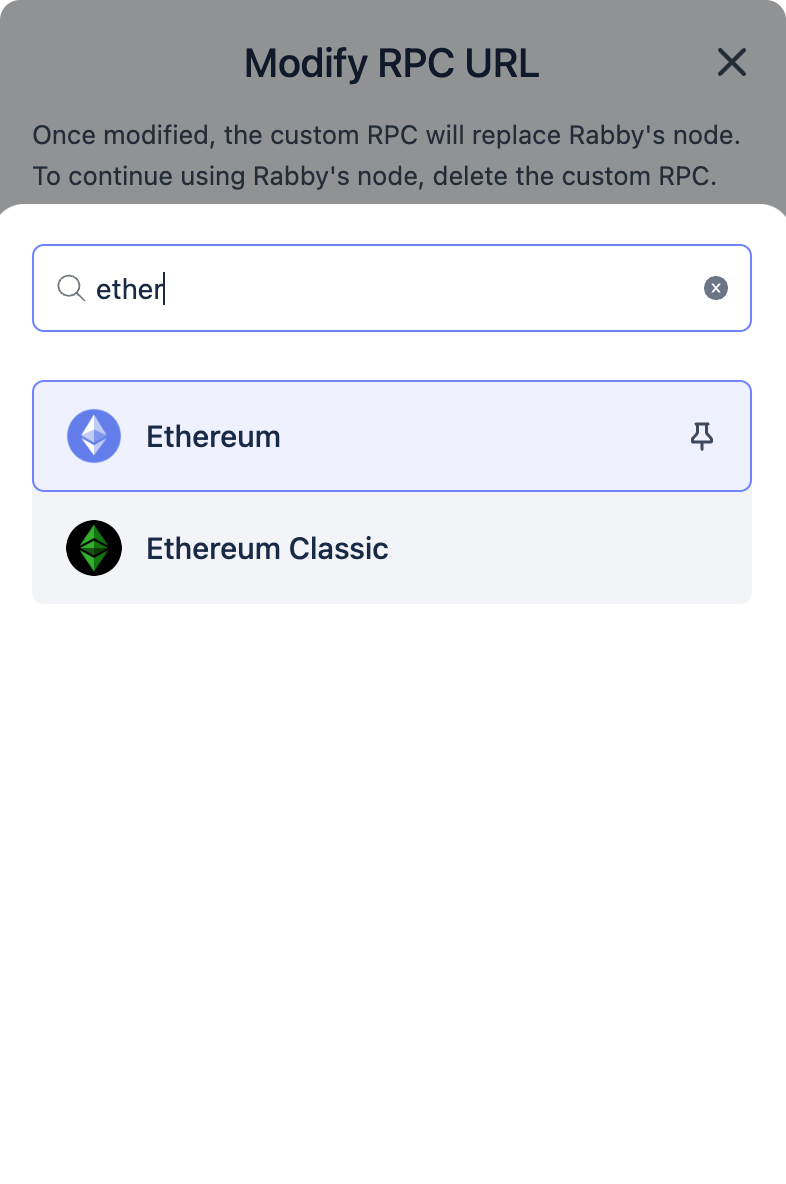
Paste the GasHawk RPC URL depending on your selected network into the
RPC URLfield and clickSave. For instance use https://core.gashawk.io/rpc/1, for Ethereum. Use the table below for reference:Chain Name RPC URL Ethereum https://core.gashawk.io/rpc/1 Optimism https://core.gashawk.io/rpc/10 Base https://core.gashawk.io/rpc/8453 Sepolia https://core.gashawk.io/rpc/11155111 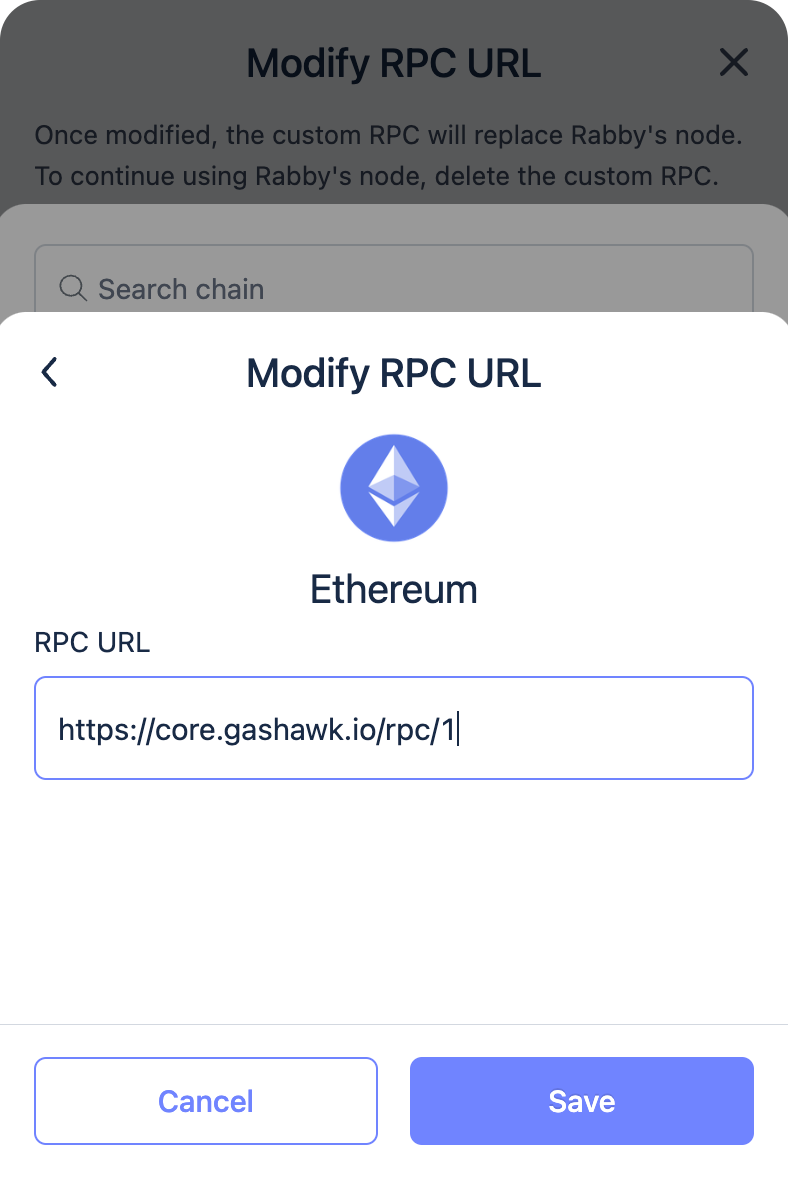
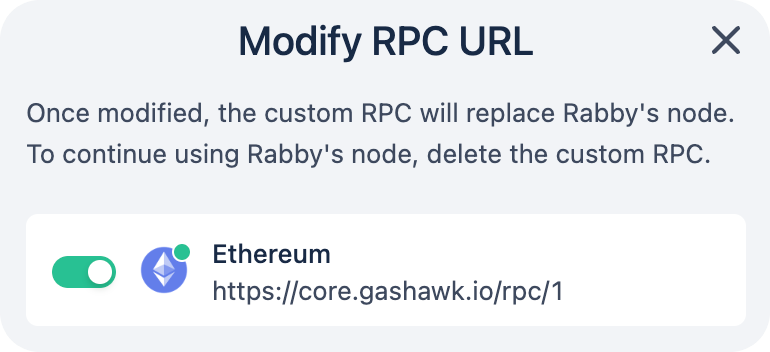
Verify that the GasHawk RPC is now active.
From the Setup page you should see a
Connected to GasHawkstatus in the top right corner.Click on the Sign in with Wallet. You will be prompted to sign a message with your wallet in order to prove your control over it. Read more about why this is needed here.
In case you need further support, please reach out to us on Discord or X.