Settings
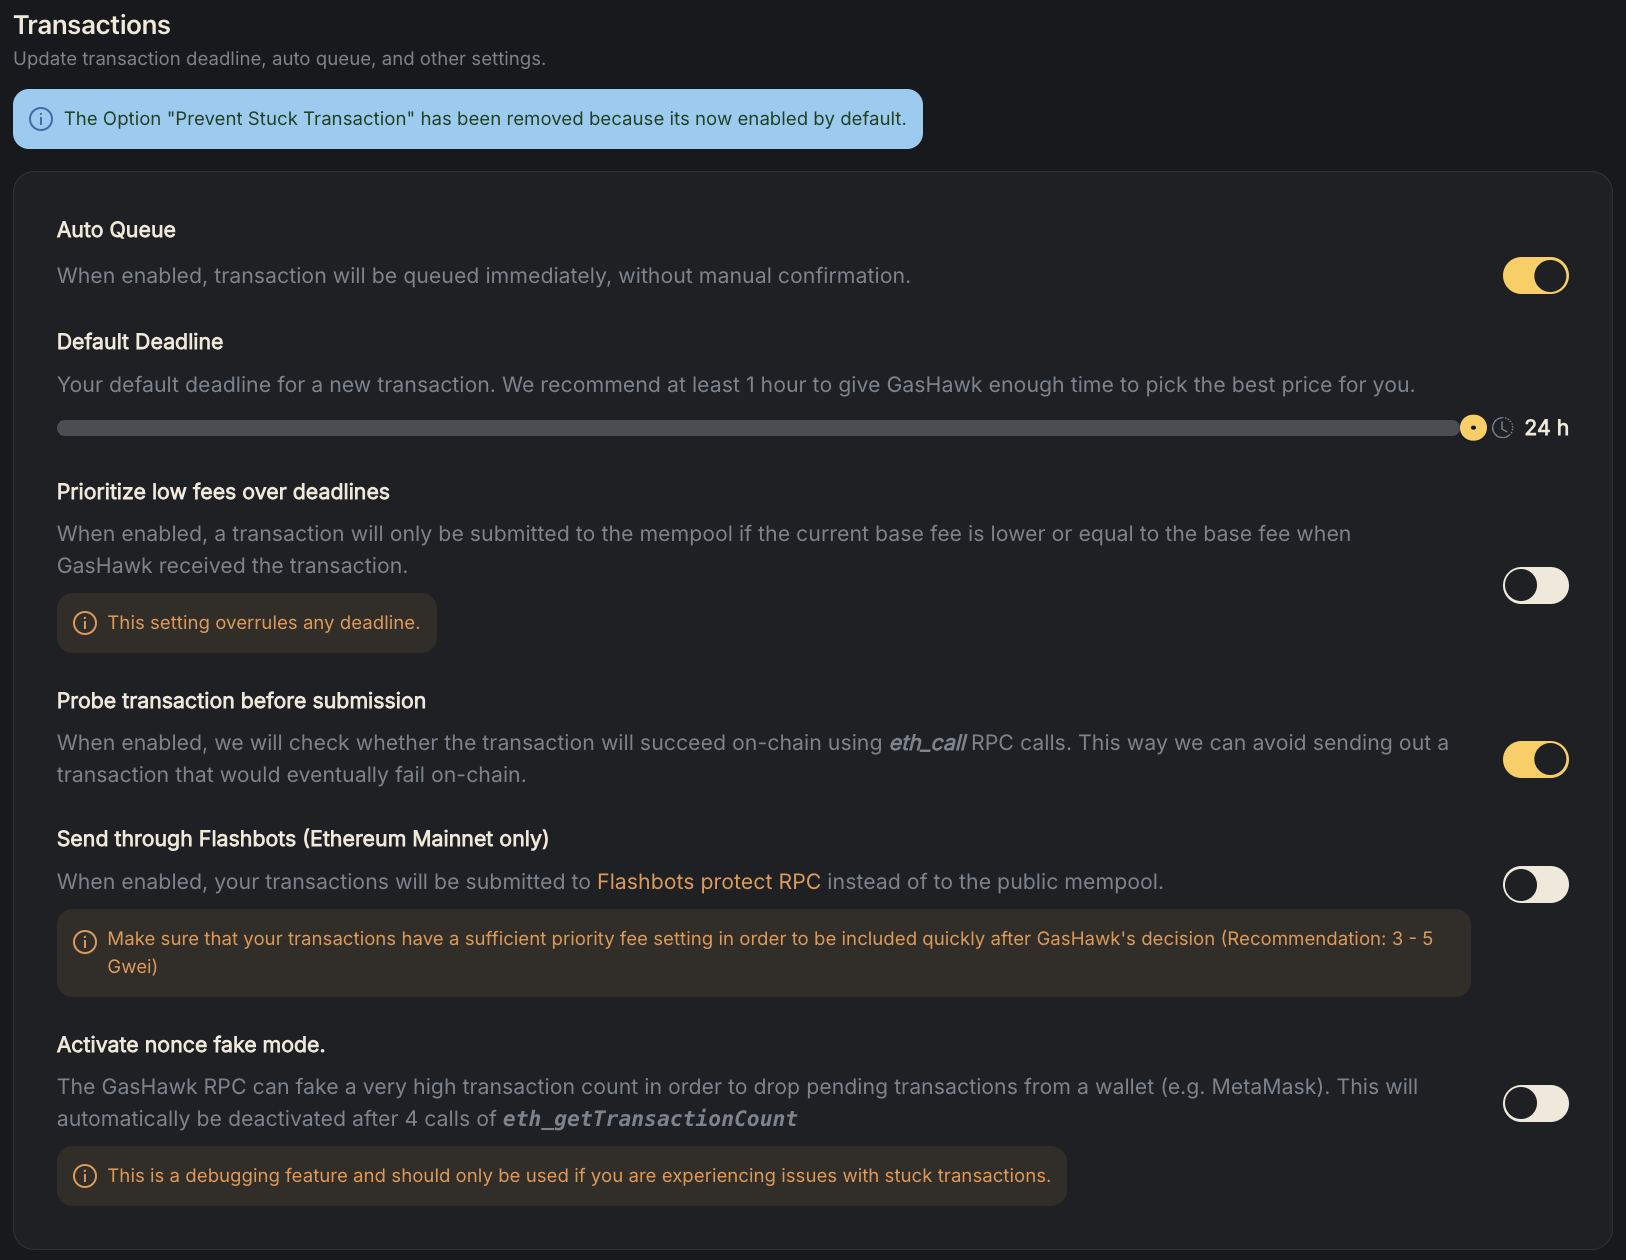
Auto Queue
The "Auto Queue" setting allows you to automatically add your transactions to a queue for submission to the Ethereum Mainnet. This means that instead of manually submitting each transaction, the system will handle the process for you and optimize the timing of the submission to help reduce transaction fees.
Default Deadline
The "Default Deadline" setting allows you to specify a time limit for your transactions to be processed and included in a block on the Ethereum Mainnet. If a transaction is not processed before the deadline, it may be cancelled or rejected - depending on your other settings (see below). After adding transactions to your GasHawk queue, you can change their respective deadlines individually.
Prioritize low fees over deadlines
When "Prioritize low fees over deadlines" is activated, GasHawk will only send out a transaction if it will not cost more than compared with the time it received the TX from you. This setting overrules deadlines.
Probe TX before submission
The "Probe TX before submission" setting allows you to check your transactions for any potential issues or errors before they are broadcast to the network. This can help to prevent your transactions from being rejected or failing, ensuring that they are successfully processed and included in a block on the Ethereum Mainnet.
Send through Flashbots
When enabled, your transactions will be submitted to Flashbots protect RPC instead to the public mempool. Make sure that your TX have a sufficient priority fee setting in order to be included quickly after GasHawk's decision (recommendation: 3 - 5 Gwei).
Nonce Fake Mode
Activate or deactivate the fake-response to eth_getTransactionCount manually. Note that it will automatically be turned-off after 4 eth_getTransactionCount calls or 3 minutes - whichever occurs first. This functionality is needed for correctly processing cancel transactions (background).

Privacy Settings
Participate in Giveaways
We do frequent giveaways for our users, if you want to participate in those make sure to turn on this setting.
Accept our cookies
We use cookies in order to analyze the site's usage and provide you support through Intercom. Please read our Privacy Policy for further information.
Delete your encryption key
After setting up your encryption key for private data (e.g. TX descriptions), you can remove the key from your browser using the provided button.